
For the love of soy. I'm entering this post into Weekend Herb Blogging hosted this week by Coffeepot at Coffee and Cornbread. I checked first with Kalyn, the originator of the event to be sure that soybeans would qualify for inclusion in WHB, and to my delight, since my new soymilk maker and tofu maker just arrived she said it was fine. After some research I bought the Soya Power from a place in Tennessee, and since they offered a total tofu making set, I couldn't resist trying that as well. (By the way, I am in no way associated with the manufacturer/dealer I'm just documenting for the curious exactly what I used.)

Warning: This will be an unusually long (and I hope interesting!) post since I am going to take you through the entire process of using one batch of dried GMO-free organic soybeans through several different products using the entire bean. The best all-purpose bean for this is a "Laura" variety, which I bought through Chambers Farms in Iowa. I took their deal which optimized the amount of beans with the postage, which meant I have 14 lbs. of soy beans! You can be sure that I will be posting some more recipes using soy in the future too!
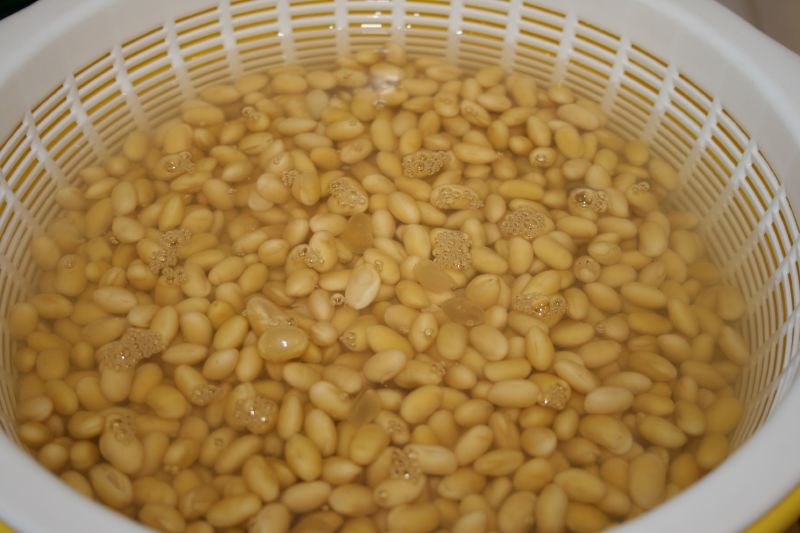
The first thing I did was decide what I wanted to make and what amount of soy beans I would need. Since my business partners in Groundwork were meeting at my place on Saturday, I thought I would at least treat them to some very fresh soy milk. I also was eager to make some tofu, so on Friday night I measured out 2.5 cups of dried soy beans, washed and rinsed in water, then left to soak overnight in filtered water. There is a small measuring and pouring cup for the soy beans included with the Soya Power, but it also happens to equal 1/2 cup. It takes 1/2 cup of soy beans to make a batch (almost a half gallon) of soy milk, and it takes four batches of milk to make one 2 lb. block of fresh tofu.
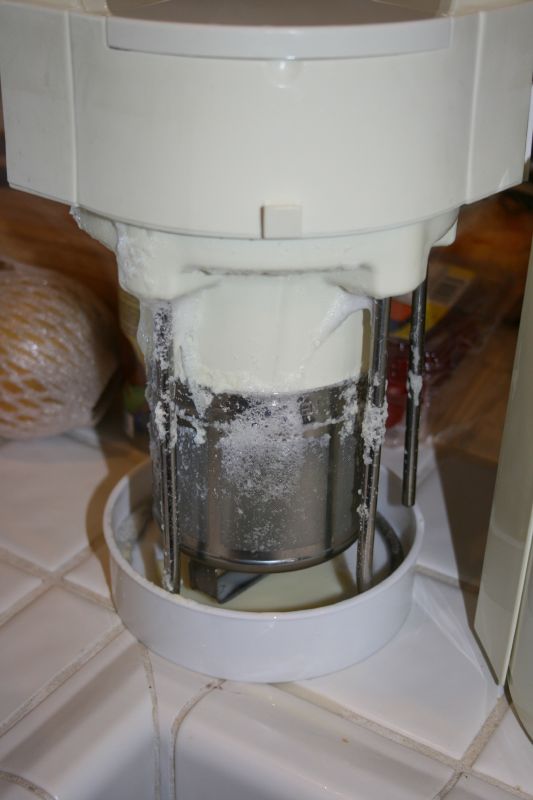
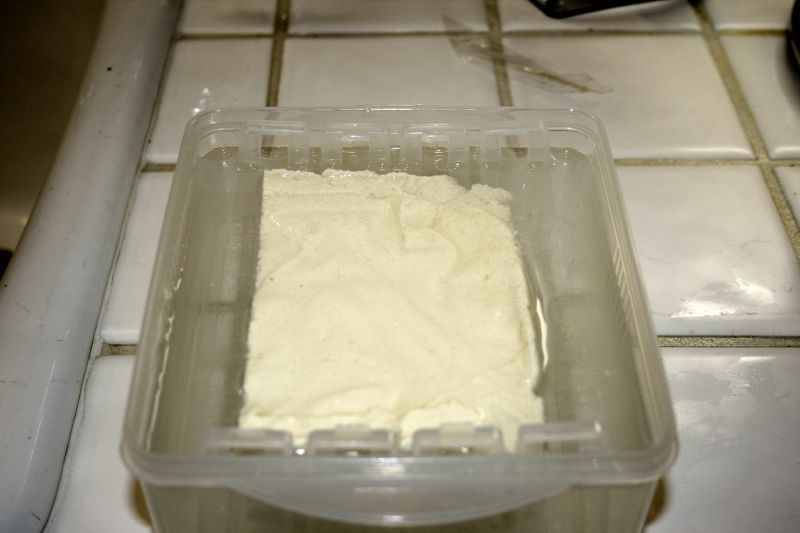
After a nice night's rest, I got up to very swollen soy beans, and realized that I needed to figure out how much of the swollen soy beans to measure into the machine for one batch. Luckily, the owner's manual mentioned that 2 7/8 cups of soaked soybeans was the equivalent of the 1/2 cup dry. (The above photo is the filter cup after finishing the soy milk making). So first I made the soy milk. I poured filtered water between the lines on the stainless steel bowl, added 1/2 teaspoon sea salt since the owner's manual warned that if you used filtered water without adding salt, there was a tenancy to boil over.
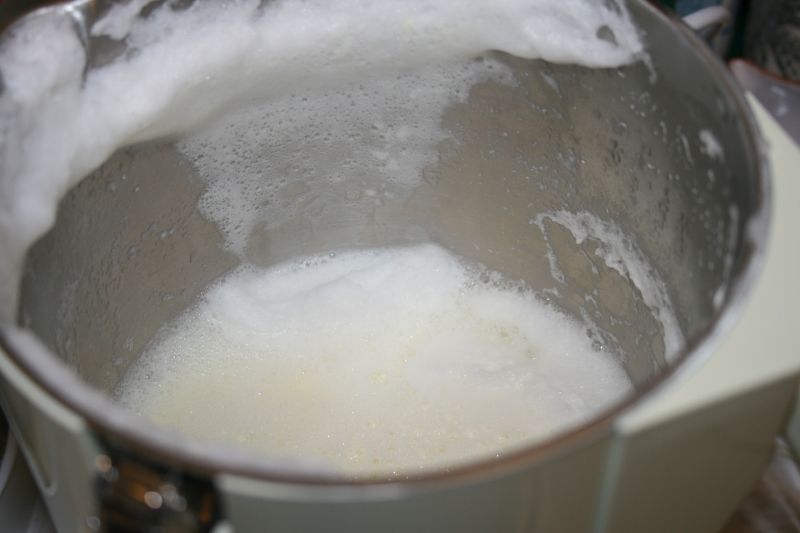
I then fed the soy beans into the feeding window, gently shaking the equipment occasionally to have the beans distribute themselves equally in the filter cup. Once all the beans were in, I placed the machine head with the filter cup attached into the bowl with the water, latched it and pushed start. In 15-20 minutes, the machine started beeping (after quite a bunch of noises since it grinds the beans while its making the milk), and that signaled it being ready.
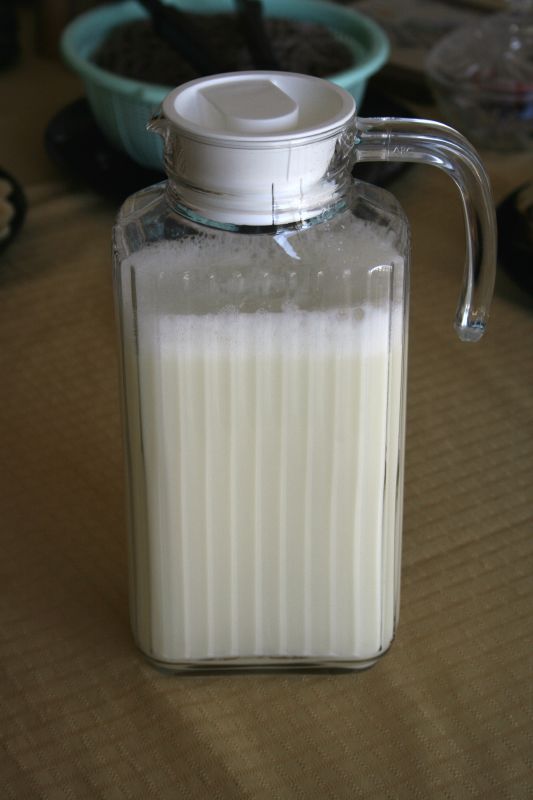
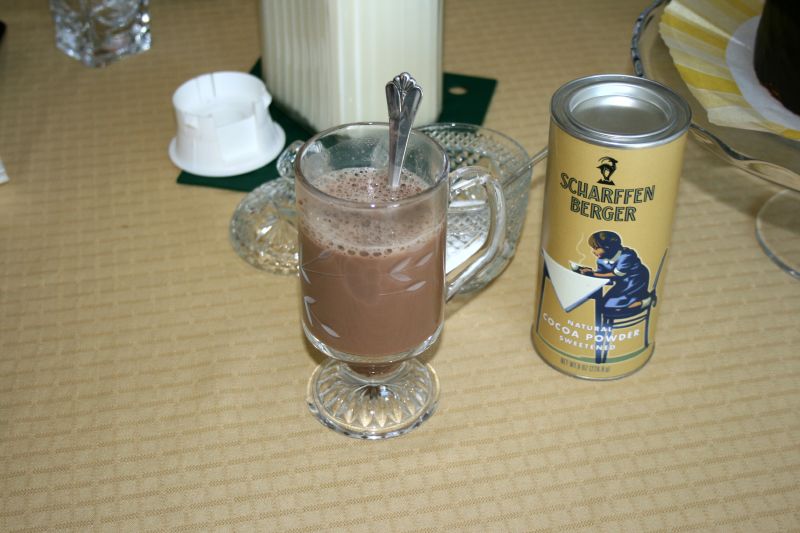
I made hot chocolate soy milk pouring the milk straight from the bowl of the maker into glass mugs in which I'd placed 1 rounded teaspoon birch sugar, and 2 rounded teaspoons Sharffen Berger Natural Cocoa Powder (sweetened). Wow! Is this good, and my guests and father all gave it a thumbs up.
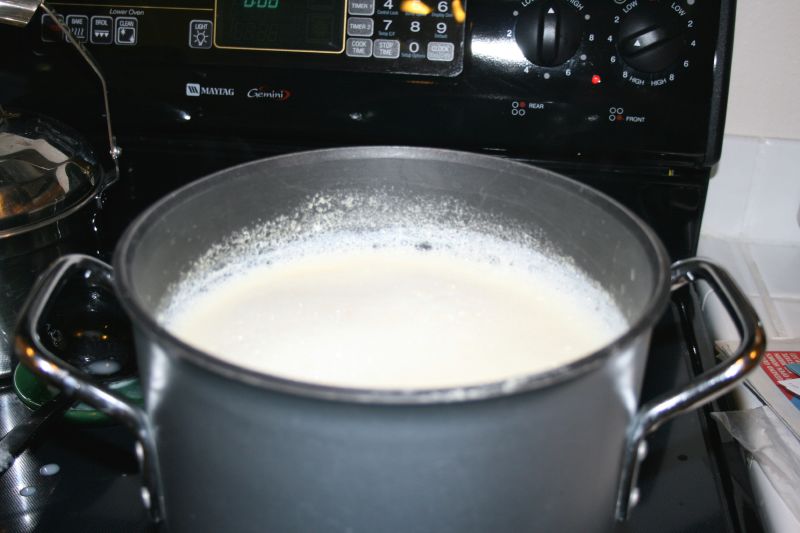
I then embarked on making four more batches of soy milk (the most tedious part of making the tofu), and pouring them into a large pot.
I kept thinking that it MUST be too much soy milk, but I discovered it was not.
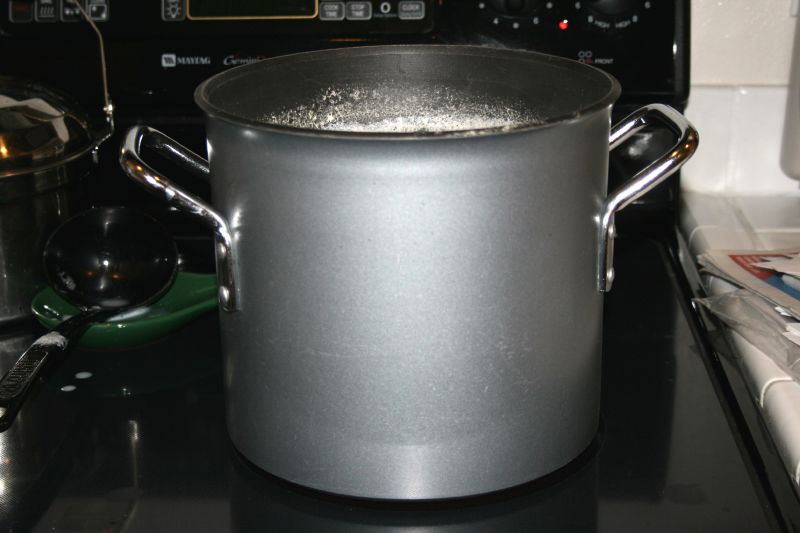
After all four batches are in the pot, you simmer it for about 10 minutes, stirring occasionally, then let the temperature of the milk settle in between 170-180F.
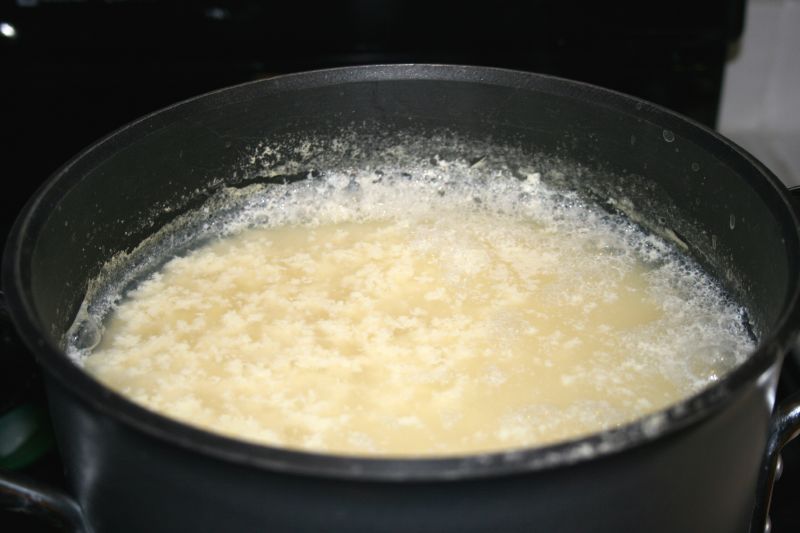
At the ready, you have 1 teaspoon of nigari dissolved into 1 cup of warm water. You then slowly pour in about 3/4 of the cup, stirring as you go. Let it rest, the watch the curdles form. Stir a bit more and look for milky areas, and add the last 1/4 cup of nigari, stirring. You can put more nigari (dissolved in water) in if you would like to have firmer tofu.
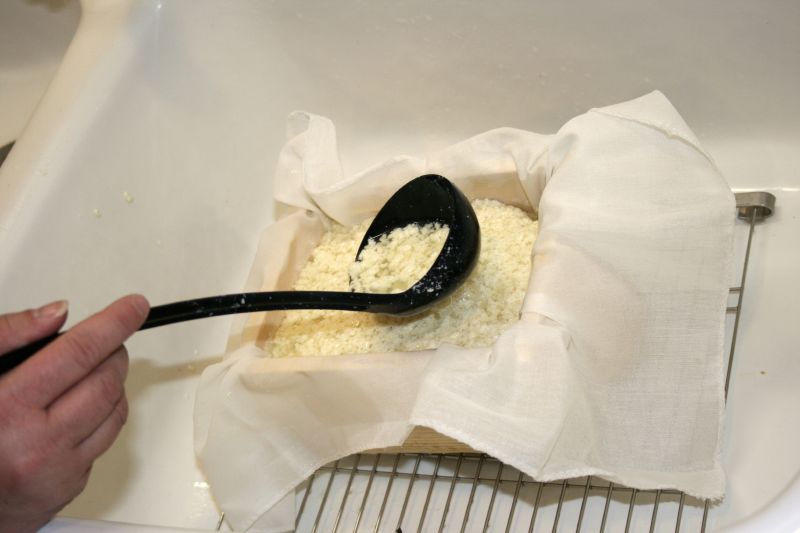
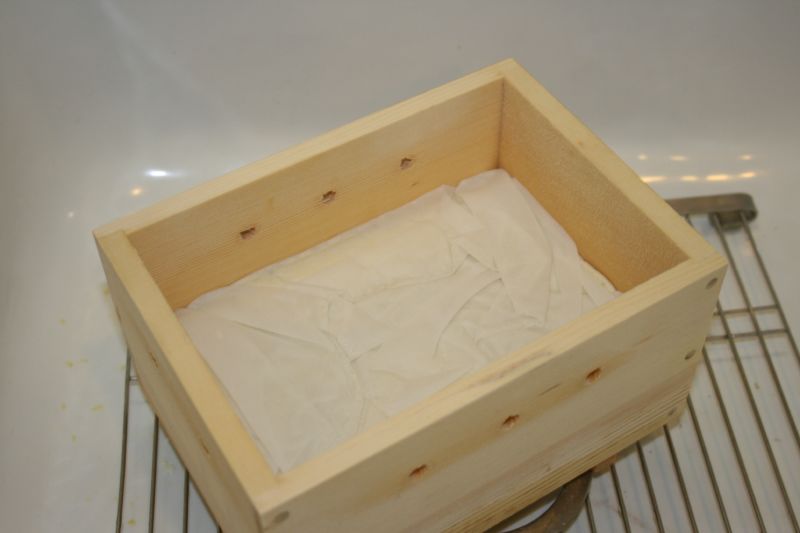
You line the tofu box with a tofu straining cloth, and ladle in the curds and whey.
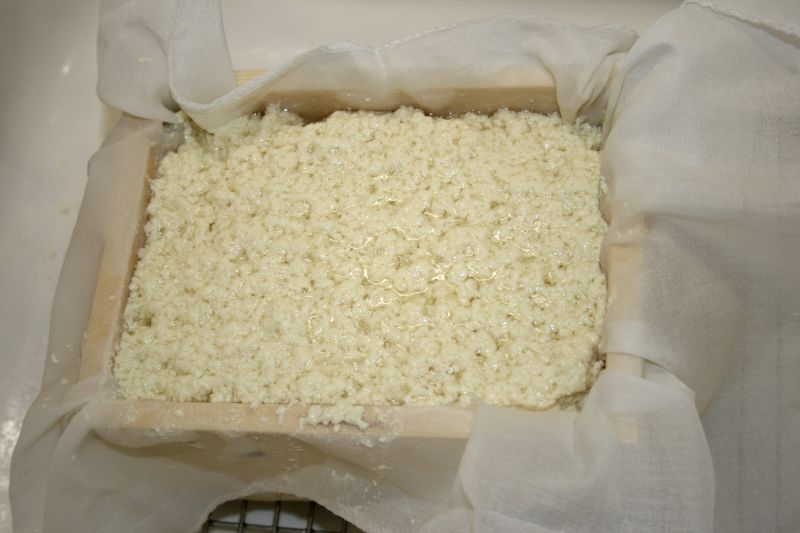
Fill it to the top, letting it drain as you go, until you fit all that's in your pot into the box.
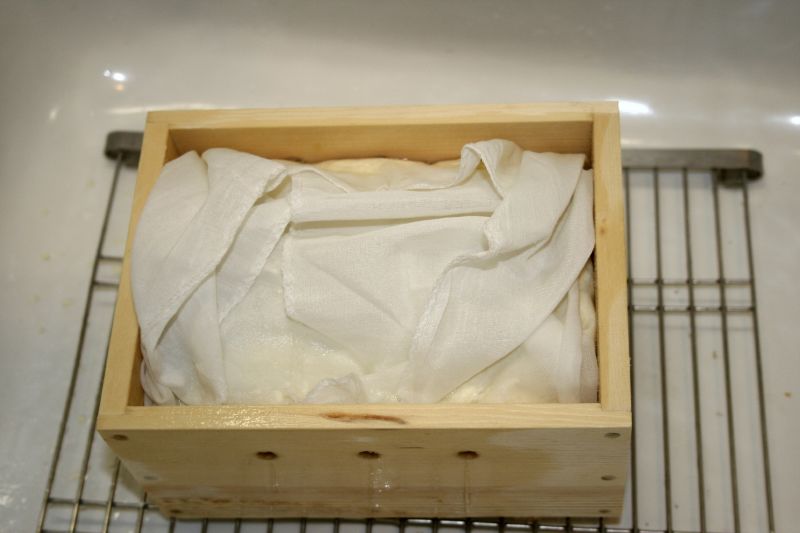
Then fold over the cloth.

And put the wooden top on.
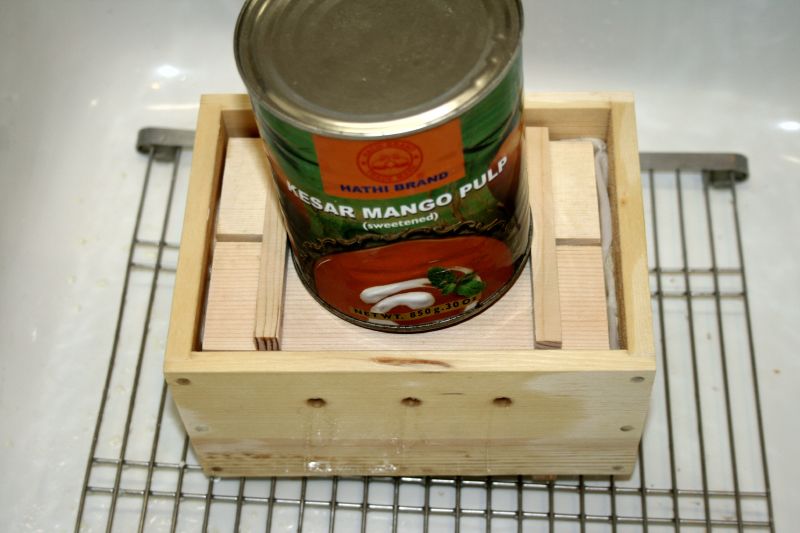
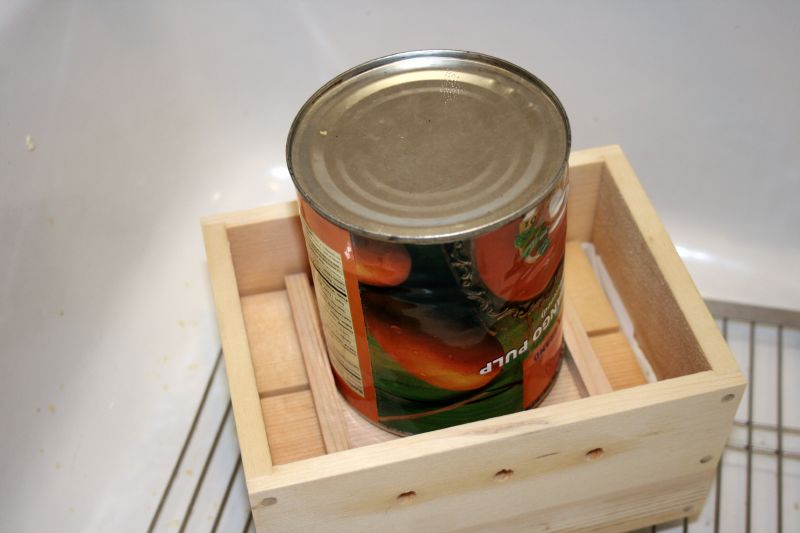
Add a 3-5 lb. weight to the top.
Wait 20 minutes.
You can see how much water it lost.
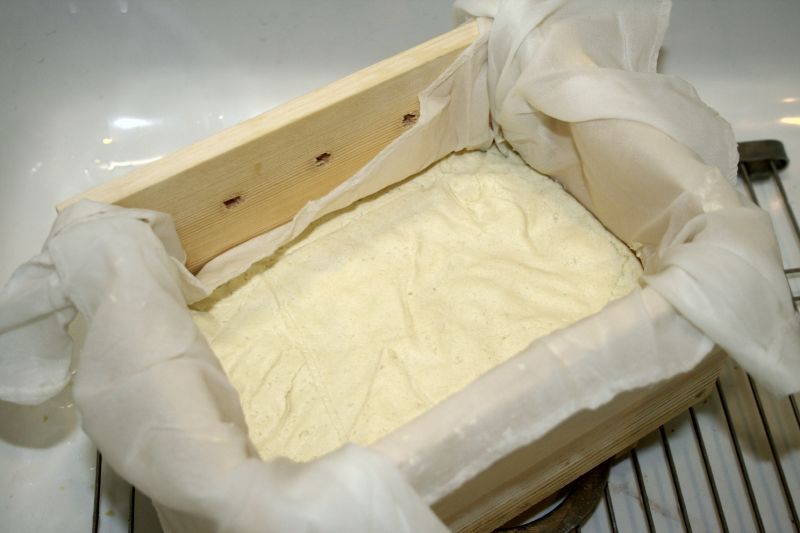
Unfold the cloth.
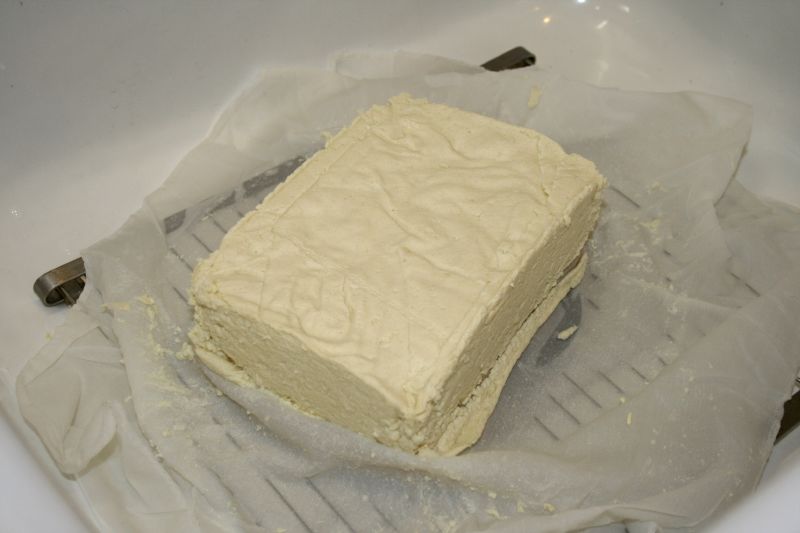
Take a look at your approximately 2 lb. brick of tofu.
I divided mine in half, one half to eat, the other to store.
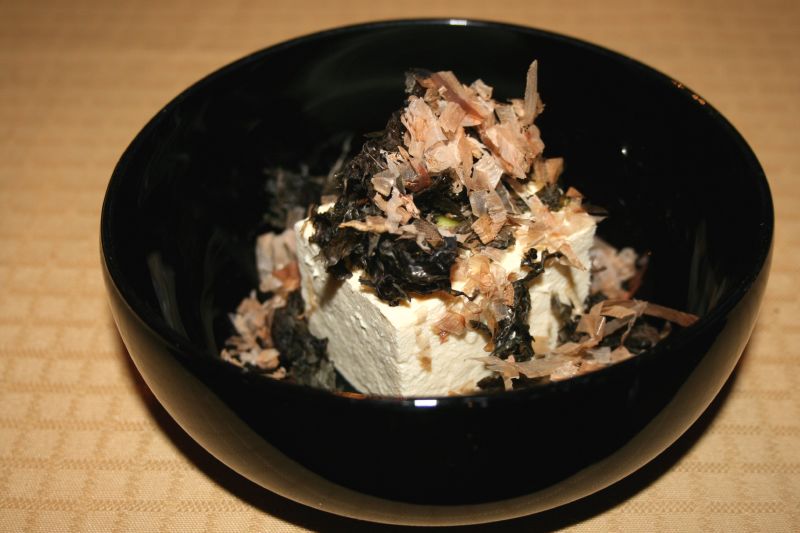
I made hiyashi tofu for dinner. Just cut into squares, add a dab of wasabi, dried fish flakes, nori and soy sauce and it's good to go. Yum! It was still warm and more delicious than the typical store bought tofu. It wasn't very hard either. I'm going to stop here, and write another post this afternoon about how I used the OKARA, the left over soy bran from making soy milk. I will also post some of the history of tofu in that post.


9 comments:
Now THAT's fascinating, Anna! I really enjoyed learning about the whole process, and the fact that you get tofu from soy milk is something I did not know. Great photos and info.
Two, no, three things.
1) You may be the only food blogger in my circle with a 5# can of mango pulp.
2) Is there anything useful you can do with the whey you drain off? (Feed it to the plants, I guess.)
3) I am so very impressed. This could bring me back to tofu. Now if only there were a local, organic source for beans.
I tried to make soy milk myself. Now I have to go on to make tofu. Great entry.
Cindy: Glad you enjoyed the post.
Cookiecrumb: 1) My friend came by with the can of mango pulp earlier that day to make mango lassi's with but ended up enjoying the soy milk so much he didn't and then left it with me for next time. It was a convenient weight! 2) Good question, which I also started thinking about once I'd finished posting. The bottom of the box is unstable, so it would need to be placed on a grate of some type over a big bowl to catch the liquid. I think I should taste it/measure the pH to think of something. My mother used to save all the cooking liquids from vegetables and use them for soup stock or breadmaking. She said otherwise all the vitamins went down the drain. I think I'd need a separate freezer though if I were to save the liquid. Hmmm.. maybe it would make a good toner for the skin? (Really have to find that pH tape). 3) Yes, I finally managed to find a source for flour, will keep my eye out for local, organic soybeans (of the Laura variety). I think California grows nearly everything, so somewhere... Thanks for your continuing encouragement!
Ulrike: I went to your post - WOW - it was even for WHB! You did it the hard way and made it look easy!
Great post! What is the consistency of your tofu? I'm thinking about buying a milk maker and making my own tofu but I want to make sure it gets a bit denser then silok tofu. Thanks.
Very interesting. I had no idea how tofu was made. This is a first for a food blog as far as I know!
Christian: My tofu was firm -- you can really adjust the nigari to make it as soft or firm as you like.
Kalyn: I was delighted to find that Ulrike had already WHBlogged the making of soy milk- but by hand rather than machine! But maybe I am the first for tofu as I can't recall ever seeing it posted either.
Great post! Nice documentation of the process, very similar to cheese making I imagine.
I want to give it a try now thanks to you.
Post a Comment